Wednesday, May 12, 2010
Through All Eyes
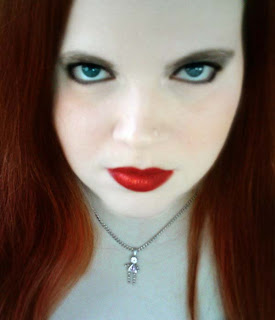
Thanks to my friend Paige for being my model. We drew a bunch of pics of eyes and taped them to her face. I took 3 pics then i put them all in the same blank document in photoshop. Then, after flattening it, i used my signature effect, of a deep blue fill layer set in the blending mode lighten. after flattening put the contrast up all the way and made it a little bit brighter, then finally i added the vintage effect in correct camera distortion. ^_^U
Hope you like it<3
Friday, May 7, 2010
Deidara...wow i was board
Wednesday, April 28, 2010
A Great Photoshop Community
If you love photoshop, want to be able to do some of the things you see, or just like photoshop and need something to do then you have to check out Planet Photoshop.
Planet Photoshop is a great place that has things like discussion areas to tutorials. It is really an awesome place. I looked at some of the tutorials, and the people who are posting them really know what they are doing, and make them easy to understand and follow. Planet Photoshop will keep you up to date on everything photoshop and whats happening in the digital world of art!
Good Retouch I found with a bonus tut.
Heres the link to a really good retouch i found.
Okay, as you can tell(by the link hopefully) i didnt do this, but i can explain the basics to how to do a retouch like this.
1.Remember, always work in layers!! Its alot easier to delete and edit things that way.
2.Edit the brightness and contrast to make it brighter, on the older versions of pse the contrast is crazy weird but on the newer ones it is alot better!
Using the eyedropper tool select the skin color, and in a new layer go over the face, then lower the opacity so it is mainly transparent but you can still see the diff. That will fix most of the skin problems.
3. For eyeshadow(IN A NEW LAYER, get the skin color of her with the eyedropper, then change the hue by sliding
4. Draw over the places you want the eyeshadow then experiment between the settings hue, color, and soft light.
Mid tones and highlights in the burn tool work best for the eyeliner and use highlights in the dodge section for the eyes to make them brighter. I have a tut. on how to put things in backgrounds and reference that if you want to.
Tuesday, April 27, 2010
Sasori
Monday, April 19, 2010
My Spiral Frenzy--awhile ago though
Thursday, April 15, 2010
Blur For Fixing Skin
In many pictures peoples faces are sometimes pixel-ish or they just have bad skin. But by using the blur tool you can fix that. I like to change the setting of the intensity to 100%. It makes it smooth and firm. And it always works...weather you want it to or not.
Wednesday, April 14, 2010
Digital Painting for project
I did this when the pen pressure on my tablet was working, now its being a poop and wont work. Not the most hi-res pic ever but its decent. I like some of my others more(scroll down and look at my painting of a girl). Whatever, i was tired. Estimated time: 1-2 1/2 min? not a real complicate pic
How to make bases
Yes, the question often asked, "I use bases all the time, but how do i make them?" Well i can-sort-of answer you. Now with the way i will be showing you, it wont be in ms paint, it will be in photoshop.
Step 1: find any anime picture.(it is easiest to do it this way, trust me) if not it will just look like a person and not a base. Now open it in pse.
http://quizilla.teennick.com/user_images/J/JA/JAZ/Jazzilawoman/1134696041_esquatre02.jpg
Step 2: Make a new layer. Now we will be using the pencil tool(we always will be when working with pixles) In a dark brown outline all of the contur of their face, but not the hair, well leave the top for after we do the rest. Now outline the neck as if they didnt have clothes on, so ignore the wrinkes and creases in the cloths.
Step 3: In black outline they eyes, nose, mouth, eyebrows, and chin.
Step 4: TOP OF THE HEAD TIME<3 What you have to do is pretend that the hair isnt there and outline it in that dark brow you did before as if they were bald.
Step 5: Coloring! Make the bottom layer invisible to check out your work, im sure its great. Make it visible once you want to get back to work. Use the skin tone that the pic has and select it with the eyedropper tool. Do the lighter color first(the one that isnt shadows). Outline the outsides of all the shadow areas, select the darker color with that took and fill all of the shadows in, then fill the lighter ones in with the previous color. Eyes are easy, just do it how you would any anime eye.
Step 6: Finishing up! Delete the bottom layer(the anime pic). Even though its only 1 layer, flatten the image. Now is the time fo fix any places with missing color.
Save it, if u want as a bitmap it really doesnt matter
Hope that helped
Monday, April 12, 2010
The 100 theme challenge
Okay!! I am starting the 100 theme challenge and i have allready done my first one. heres all 100 themes and ill be giving you the updates with all of my posts, ps. i put the link to my(sort of horrible) first post for it, just click on the theme!
1. Introduction
2. Love
3. Light
4. Dark
5. Seeking Solace
6. Break Away
7. Heaven
8. Innocence
9. Drive
10. Breathe Again
11. Memory
12. Insanity
13. Misfortune
14. Smile
15. Silence
16. Questioning
17. Blood
18. Rainbow
19. Gray
20. Fortitude
21. Vacation
22. Mother Nature
23. Cat
24. No Time
25. Trouble Lurking
26. Tears
27. Foreign
28. Sorrow
29. Happiness
30. Under the Rain
31. Flowers
32. Night
33. Expectations
34. Stars
35. Hold My Hand
36. Precious Treasure
37. Eyes
38. Abandoned
39. Dreams
40. Rated
41. Teamwork
42. Standing Still
43. Dying
44. Two Roads
45. Illusion
46. Family
47. Creation
48. Childhood
49. Stripes
50. Breaking the Rules
51. Sport
52. Deep in Thought
53. Keeping a Secret
54. Tower
55. Waiting
56. Danger Ahead
57. Sacrifice
58. Kick in the Head
59. No Way Out
60. Rejection
61. Fairy Tale
62. Magic
63. Do Not Disturb
64. Multitasking
65. Horror
66. Traps
67. Playing the Melody
68. Hero
69. Annoyance
70. 67%
71. Obsession
72. Mischief Managed
73. I Can't
74. Are You Challenging Me?
75. Mirror
76. Broken Pieces
77. Test
78. Drink
79. Starvation
80. Words
81. Pen and Paper
82. Can You Hear Me?
83. Heal
84. Out Cold
85. Spiral
86. Seeing Red
87. Food
88. Pain
89. Through the Fire
90. Triangle
91. Drowning
92. All That I Have
93. Give Up
94. Last Hope
95. Advertisement
96. In the Storm
97. Safety First
98. Puzzle
99. Solitude
100. Relaxation
If you would like to do the challenge i would love to have someone to do it with<3
Wednesday, March 24, 2010
10 Great Uses For Photoshop
Link to original
1. Restoring Old Photographs.
Have a look through that old family photo album - the really old one from up in Grandma's attic. Inside there are probably a few photos from way back when that haven't stood the test of time so well. They've got cracks and tears that really spoil their appearance. Scan them into Photoshop, and then set to work with the Clone Stamp, Healing Brush, and Patch tools. The Healing Brush in particular is a great tool for this purpose as it samples data from one part of the picture and blends it in with what's already there.
2. Correcting Mistakes.
We've all done it: Had an attack of "finger over the lens syndrome," or got too close with the flash, so our subjects suffer from "red eye" and look like extras from a horror movie. Use the crop tool to salvage something usable from your obscured photo, and the enlarge wizard to blow it up to a reasonable size. For "red eye" and "pet eye," use the eyedropper tool to sample color from around the iris, and a brush to paint away the red.
3. Adding Graphics to Videos.
It's a little known fact, but many domestic and professional nonlinear editing systems (especially the Mac based ones like Avid or Final Cut) enable you to import Photoshop .psd files directly into the timeline.
4. Creating Text Effects for Print and Web.
There's an almost unlimited amount of things you can do with text in Photoshop. Use the Type Mask Tools to create picture filled text, then upload the results to your web page - or print them out for a one of a kind T-shirt.
5. Turning a Photo Into a Work of Art.
Everyone likes to have nice things to look at. Most of us like to have pictures on the wall, and something that looks different from what other people have on their walls is a definite plus. Unless you're blessed with artistic talent, though, this can be very expensive - until now. Use one of Photoshop's many Artistic or Brush Stroke filters to turn your photos into "new masters," then print them out on quality art paper.
6. Designing Web Banners and Buttons.
Photoshop comes with a predefined web banner sized canvas. Photoshop's sister application, Image Ready, comes with several - and lots of tools for animating text and pictures. You can also create interactive buttons that enhance a web browsing experience.
7. Adding Text to Photographs.
Impress your boss by putting the company name on the side of an airliner, building, or racing car. Use the Move Tool to skew the text to fit the contours of the picture, adjust the opacity a little, and hey presto! The text will look like it's always been part of the photo.
8. Combining Pictures, Text, and Graphics to Make Covers for Books, Reports and CDs.
Photoshop contains many of the image manipulation capabilities of high-end DTP applications that cost thousands. Use the "Layer via Cut" command to make your title text go behind part of the picture - just like on the cover of "Rolling Stone."
9. Designing Web Pages.
Did you know that Photoshop and Image Ready can turn your photograph or artwork into a web page? Use the slice tool to cut your work into easily downloadable pieces, then the rollover function to embed website URLs.
10. Combining Pictures to Make the Impossible Possible.
Come on! You didn't seriously think that Michael Moore and President George W. Bush really stood hand in hand on the White House lawn for the Fahrenheit 9/11 poster, did you? I don't know for certain that they used Photoshop to fake that picture, but they certainly could have done. With Photoshop you can remove the background from one picture, take some elements from another, and combine them with the background from a third to create a picture that could never have been taken for real. Who says the camera can't lie!
Shaun Pearce is a writer and video maker. His latest production "Photoshop Master" shows you how to get the most from Photoshop, and can be downloaded from
Tuesday, March 9, 2010
Picnik
Click here to go to picnik.com
Picnik.com is an awesome photoediting site where you can make collages, slideshows, and draw on pictures.
heres some of what it can do
before
AFTER!!!!
Picnik.com is an awesome photoediting site where you can make collages, slideshows, and draw on pictures.
heres some of what it can do
before
AFTER!!!!
Photoshop.com
Here is one of the edits i simply did on photoshop.com, of course i have an account on it and i have the photoshop iphone/ipod touch app
Heres the link in case it didnt show up
Monday, March 1, 2010
My OC's Now
This is horrible, you dont have to tell me, i did it awhile ago. or....you could be supporitive and tell me how its good!
Heres their live stories!!!!:
Sue:
Sue loves to sing, and sings from the soul. She is best when singing opera but shows her flare in pop music. Her hair is almost always up but you will never find it in one pony tail, it will always be separated into two. She has no best friend because she is close with everyone. She has a hidden talent.
Cradella:
Cradella is my first character, and I have already posted a pic of her. You will see her with green eyeshadow wherever she is except for the beach, but she never takes off her red necklace. When she was little her best guy friend moved away from her and she will be sad about that for the rest of her life, but she is too strong and stubborn to let herself go emo. She is a great swimmer too and devotes her life to it. She knows something everybody else dosnt.
Vivica:
She strives for attention, and is a great actress…she never shows she wants attention though. Her dad is very….very rich and he is divorced, he is now on his 5th wife and claims he will not get divorced again. Before they had gotten divorced she was one of her states best SKATERS!!!, which is now how she seems now is it? Her mom had taought her to skateboard and when their parents got divorced he told her that she was forbidden to skate ever again. Due to the lack of what she loved(skateboarding) she started to act and was great at it. Nobody knows she used to skate.
Lana:
Lana hates skateboarding, but everyone thinks shes a skater….but she is a true surfer and has dedicated her life to it. She has a temper too. She has great parents and three brothers, could you guess? She also plays guitar. She has a secret too.
Massey:
She gets nervous soooo easy. If she does not get a good grade she comes crying to her friends. She is not a complex character but she adds humor to everything. She is open about everything.
Monica:
She is an even mix of each character. She sings like Sue. She was also best friends with the same boy that Cradella was and lost him. She loves to skate and act like vivica. She hates when people sterotype her like Lana. And she adds humor to everything like massey. She has 1 HUGE secret.
base
My OC's as children
Ok here are my OC's, i have a pic of them at their age now that i will post soon. I will attach their life stories with them as they are now, it will most likely be my next post, sorry that both of the OC ones are not the BEST thing ever but its ok...
base
Baby Lineart
Sunday, February 21, 2010
Friday, February 19, 2010
Monday, February 8, 2010
Tutorial: putting people/anything really into photos
Open the pic you are going to put into another and the pic that you are going to put the person into.
select the person, use the lasso or the selection brush, the selected area should look like this
use the command ctrl c or simply copy it
switch over to the other pic and press ctrl v or paste it in
use the eraser to get rid of the unwanted edges
finally flatten it by going to layer->flatten image
select the person, use the lasso or the selection brush, the selected area should look like this
use the command ctrl c or simply copy it
switch over to the other pic and press ctrl v or paste it in
use the eraser to get rid of the unwanted edges
finally flatten it by going to layer->flatten image
Fly Free Bird: a photo-manip i did
I call it, stubborn flight.
bird stock
background stock
water ripple
cloud stock
editing by me!!!!!!!!!!!!!!
Black and White: a snowy day
Wednesday, February 3, 2010
Example of photo-manips
http://roxasjud.freehostia.com/photoManips.html
Jroxas is an awesome photomanipulator, and you have to admit, when it comes to photoshop there are many styles and some are better than others at certin 1s. Seriously look through his portfolio and all of his stuff. He uses a unique style and i loveeee where he gets his inspiration.
Thursday, January 28, 2010
Some PSE Hints and tricks
1 Quickly Access Related Tools
1. Hold alt and click on a particular tool’s icon to toggle related tools.
2 The Move Tool
1. Hold CTRL to access the Move tool at anytime.
3 Duplicate Current Layer
1. Hold CTRL and ALT to drag a duplicate of the current layer.
4 Use The Eyedropper Tool To Choose A Background Colour
1. With the Eyedropper tool (I) selected, hold ALT when selecting colours from the image window to change the document background color.
5 Access The Hand Tool
1. Hold the SPACE BAR to access the Hand tool (H).
6 Copy Colour Values To The Clipboard
1. With the Eyedropper tool (I) selected, right click on an image to reveal a menu.
2. Select Copy Color To Html.
3. The hexadecimanl value will then be on the clipboard ready to pasted wherever you choose.
7 Toggle Quickmask Mode
1. Simply press Q to toggle between Standard mode and Quickmask mode.
8 Quickly Increase/Decrease Brush Size
1. Press [ to increase the size of the active brush.
2. Press ] to decrease the size of the active brush.
9 Zoom In and Out Effectively
1. Press CTRL + to zoom in.
2. Press CTRL - to zoom out.
10 Access The Zoom Tool Menu
1. With the Zoom tool (Z) selected, right click on the image window to reveal the Zoom tool menu.
2. The menu includes the following options; Fit On Screen, Actual Pixels, Print Size, and Zoom In and Zoom Out.
____________________________________________________________________________________
http://alanwho.com/photoshop/10-photoshop-tool-secrets/
Skin Fixing(not by me, i linked to it)
Link to page: http://images.google.com/imgres?imgurl=http://www.photographyicon.com/blog/wp-content/uploads/2008/11/fixing_skin_blemish.jpg&imgrefurl=http://www.photographyicon.com/blog/2008/11/26/removing-skin-blemishes-with-photoshop/&usg=__2zGL-gooZLZpNzkGw3mZyYUaEZc=&h=347&w=568&sz=67&hl=en&start=23&um=1&tbnid=wUwjxg3apaxL_M:&tbnh=82&tbnw=134&prev=/images%3Fq%3Dphotoshop%2Bbefore%2Band%2Bafters%26ndsp%3D21%26hl%3Den%26sa%3DN%26start%3D21%26um%3D1
Photoshop brush downloads
Heres some links so that you can download some awesomely awesome pse brushes, they should most likely be abr files but srry if they are zips
http://photoshoptutorials.ws/photoshop-downloads/photoshop-brushes/
http://www.brusheezy.com/
http://www.noupe.com/photoshop/1000-free-high-resolution-photoshop-brush-sets.html
http://photoshop.digitalmedianet.com/articles/viewarticle.jsp?id=36502
http://photoshoptutorials.ws/photoshop-downloads/photoshop-brushes/
http://www.brusheezy.com/
http://www.noupe.com/photoshop/1000-free-high-resolution-photoshop-brush-sets.html
http://photoshop.digitalmedianet.com/articles/viewarticle.jsp?id=36502
Wednesday, January 20, 2010
Old retouch i found
Top is before and bottom is after to check it out go here(its tons better up close!!!) http://fc01.deviantart.net/fs51/f/2009/270/e/5/If_Only_by_pieface75.jpg
link to the stock: http://dgs-stock.deviantart.com/art/126-137965411
Old Photo Restoration
http://fc02.deviantart.net/fs71/f/2009/345/2/5/Photo_Restoring_by_pieface75.jpg
Awhile back...okay so in december i got board so i decided to try to restore an old photo in photoshop, so here it is
I got the stock from http://sundel.deviantart.com/
So tell me how i did
How to make brush sets!!!!!!
Brush sets are fun to use, and simple too. First starting with a new image( ctrl n), paste the pic u want to make a brush in. go to define brush or define brush preset. After making all that you want, save the set. it should be an abr file!!!! if my instructions were horrible....your evil and go to this link!!!!
http://www.createblog.com/photoshop-tutorials/342-making-a-brush-set/
pse8/7
Well the new pse(pse 8) has been around for awhile but is it really that much differient than 7. Take a look at the link http://graphicssoft.about.com/od/pixelbased/gr/pselements.htm
This link will direct you to an article of what people think of the new pse. I dont really like the new one because it is SO much like 7. Disagreing with the article, i think that pse 7 is beast. And it is not for amature photographers. I have seen the better photo-editing programs and i think that the pse seires are much better, but that may just be for the type of editing i do, but i do a wide varitity from
photo-manips to simple retouches to full-out renderd things. Its really up to the user.
I NEVER really use the organizer, i think thats there for people who wanna say that they use pse but just always press organize unstead of the edit.......wooow. Okay, it is beginer friendly if you want it to be, but if you know what you are doing and have a plan for what you want, then it can be much harder.
Photoshop.com is for people who are too lazy to use real photoshop.....and i say get a life!!!!!!
I just use it for editing purposes.
Thursday, January 14, 2010
simple face-over!!!
Simple Animation in Photoshop
http://fc06.deviantart.net/fs50/f/2009/333/6/1/Icon_for_breadfrommypants_by_pieface75.gif
above is a link to a simple animation i did awhile ago!
here is a simple animation i did as an avatar in pse7. To create animation you make a seprate layer for each frame, when you save you can ither save for web or save it as a gif file. When the panel there comes up, click the checkmark box that says animate, below.....towards the bottom you can choose the frame duration. Then save.
Please tell me if you cannot see the animation because if not i will post a link to where it is animated!!!!!!
Wednesday, January 6, 2010
Despecle Is Amazing
Okay, when your using a base or doll, or drawing a pixle, sometimes the hardness of it can be annoying. Go to filters-> noise-> despecle
It is amazing because it looks like it was more painted or airbrushed than if you were using the pencil!
And use ctrl F to repeat filters!!
It is amazing because it looks like it was more painted or airbrushed than if you were using the pencil!
And use ctrl F to repeat filters!!
Wednesday, November 18, 2009
Makeup edits
link to original--> http://acclaimimages.com/photos/aa.jpg
Stock Photograph by Verna Bice
Okay, in this edit I changed the lip color in two ways, first i used soft light with a light pink and added lip liner with a less hard look. Then i magnet lassoed it to select the entire set of lips, went to adjustments and changed the hue and saturation, depending on the picture it will vary with what you use. For the eye color i simply used the color replacement tool while having an aqua in the pallete. I used sharpen to make the eyelashed look more defined and then used burn->midtones around the entire eyeline for the eyeliner. The eyeshadow is soft light in soft pink, and the blush which didnt come out as well was a less dark pink.
Friday, November 13, 2009
Coloring in a sketch
I colored in one of my horrible sketches, i would post some of my good ones but this is a photoshop site.....and not a drawing site! Soft light, overlay, color, darken with midtones, thats all i really used.
Desert Converse (using overlay)
Liquify
I did this last year.
To try to create a similar effect go to the layers tab->distort->liquify
Try fooling around with that
Using Doll Bases
Tuesday, November 10, 2009
How to shapen a blurry photo
This is something that will always come in handy. I will show you how to fix the detial/sharpen your photo.
1. Open you photo into photoshop (ctrl O)
2. Create a duplicate layer (in some versions ctrl j)
3. Go to you filter pallete, under stylize click emboss
4. Now you should be in the emboss window. We will change some of the settings here
The angle should be at 135
The height should be anywhere from 4-6 (for most photos)
Then Amount should be somewhere in the low 120's such as 122(for most pics)
Your not done here so its gonna look wierd so far
5. After hitting okay, you should draw your attention to the layers pallete. Where it says normal(also known as the blending mode) click the arrow.
6. Change the setting there to overlay
7. This step isnt necesary: you can see how well it was done by making that layer unvisible(clicking the little eye next to the thumbnail on the layer pallate) remember to make it visible again
8. Flatten the image go to layer->flatten image
9. save (ctrl S)
Monday, November 9, 2009
One Of My Favorites
Thanks to http://the1stgrape-stock.deviantart.com/ (the first grape stock) for letting me use her wonderful sock images!
The editing done for this was done using soft light, alot, color, midtones (obviously for the eyes), and as you can see i added a lighten layer with dark blue, and then a vintage on the edges.
Pasta Pratice Post
In creating this effect I first "yellowed" the photo. I applied contrast and a vintage effect on the "correct camera distortion" filter.
Subscribe to:
Posts (Atom)